EVV Setup
EVV (electronic visit verification)
EVV requires capturing 6 data elements to verify the service being billed:
- Patient receiving the services
- Practitioner providing the service
- Type of service
- Location of service
- Date of the service
- Time the service begins and ends.
EVV through Sandata
How to Set Up EVV Integration with Sandata
Before starting, request for your account manager to connect your Sandata account to Chorus.
- On Business Units for practitioners who will be capturing EVV, set "EVV Enabled" to yes.
- On Insurance Plans for which you’d like to verify sessions through EVV, add “EVV Required” as an Insurance Plan Billing Requirement.
- On the Insurance Plan:
- Fill out the EVV Payer ID assigned by Sandata
- Set the Medicaid toggle to Yes
- On patient coverages for Medicaid insurance plans, fill out the patient’s Medicaid ID
- On practitioner contacts, fill out the practitioner’s SSN. (Only users with PII Access Role will be able to fill out the SSN).
- Notify your providers that EVV has been enabled and request that they allow location access when the Note app requests it upon pressing 'Start Session'.
When EVV is set up:
- When the practitioner presses Start Session:
- The start time of their session is updated to match the exact time they pressed Start Session.
- Their exact geolocation (latitude and longitude) is tracked.
- When the practitioner presses End Session:
- The end time of their session is updated to match the exact time they pressed End Session.
- Their exact geolocation (latitude and longitude) is tracked.
This applies to sessions where:
- The insurance plan benefit is set to Requires Patient Present.
- The patient's location that the session is scheduled at has location type "home" or "other".
- The provider is using a mobile device, allowed location access, and pressed start/end session on the day of the session.
Correct EVV Transmissions to Sandata
An EVV Manager can view, correct, and resubmit visits that were rejected or failed to transmit to Sandata.
On the EVV Transmission Dashboard, an EVV Manager can review EVV transmissions and take the relevant next steps:
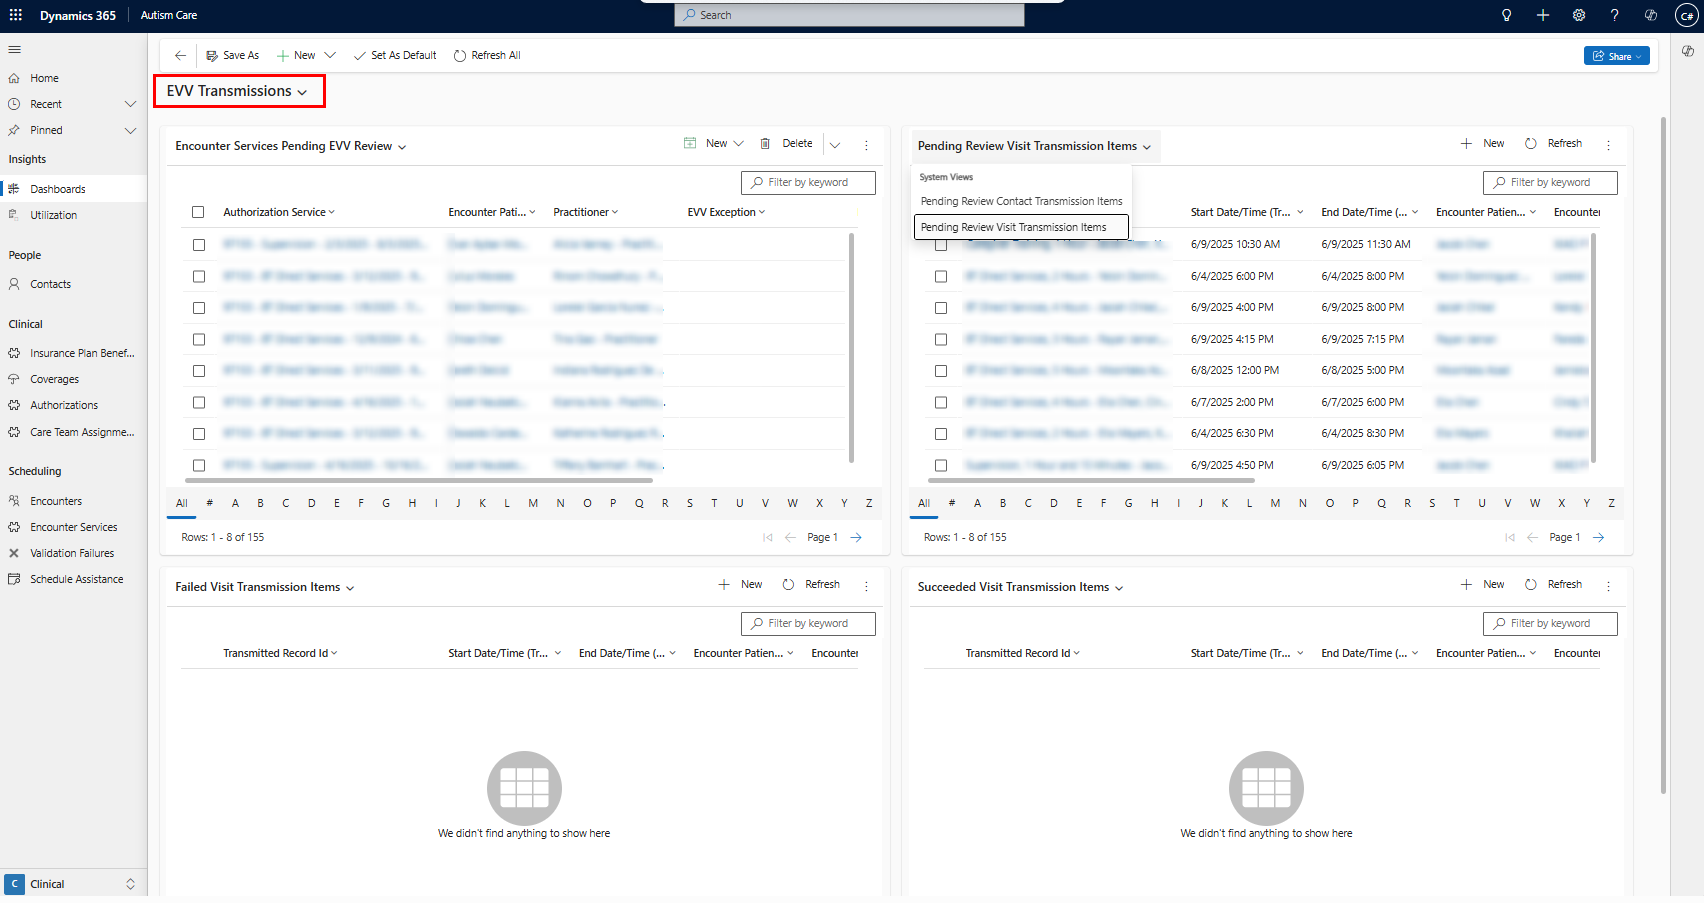
| View | Description |
|---|---|
| Encounter Services Pending EVV Review | Use this view to go through encounter services that need corrections. |
| Pending Review Visit Transmission Items | No geolocation was tracked for this session, or the session was edited and resubmitted. |
| Pending Review Contact Transmission Items | The Medicaid ID for the patient, or the SSN for the practitioner, is missing or invalid. |
| Failed Visit Transmission Items | The visit transmission was rejected by Sandata, see error message on transmission item for details. |
| Failed Contact Transmission Items | The contact transmission was rejected by Sandata, see error message on transmission item for details. |
How to correct and submit a Pending Review Visit Transmission
- On the EVV Transmission Dashboard, open the encounter service pending EVV Review.
- Fill out the exception you are acknowledging. Exception codes are defined by your state.
- Fill out the Reason Code. Reason codes are defined by your state.
- Fill out a Change Memo if your state requires one for the selected Reason code.
- On the Transmission Item tab, open the transmission item and change the status from Pending Review to Awaiting Submission.
How to correct and submit a Pending Review Contact Transmission
- On the EVV Transmission Dashboard, open the contact pending EVV Review.
- Identify which field is missing (SSN on practitioner, or Medicaid ID on patient coverage) and fill it in.
- On the EVV Transmission Dashboard, open the transmission item and change the status from Pending Review to Awaiting Submission.
EVV Encounter Validation
How to Set Up EVV for Encounter Validation
- On Insurance Plans for which you’d like to verify sessions through EVV, add “EVV Required” as an Insurance Plan Billing Requirement.
- Notify providers that they will now need to use a mobile device, allow precise location access, and press start/end session on the day of their session for session to pass validation. Edits made to the session timing after pressing start/end will cause the session to fail validation.
When EVV is set up:
- When the practitioner presses Start Session:
- The start time of their session is updated to match the exact time they pressed Start Session.
- Their exact geolocation (latitude and longitude) is tracked.
- When the practitioner presses End Session:
- The end time of their session is updated to match the exact time they pressed End Session.
- Their exact geolocation (latitude and longitude) is tracked.
This applies to sessions where:
- The insurance plan benefit is set to Requires Patient Present.
- The patient's location that the session is scheduled at has location type "home" or "other".