Billing Workflow
A charge item is automatically created when an encounter service is created. The status of the charge item is set to 'Scheduled.'
- When the session is started in the Note app, the charge item is set to status 'Awaiting Submission.'
- When the session is submitted in the Note app, the charge item is set to status 'New.'
The Billing workflow starts with New charge items, primarily in the Claims app. There are 2 parts to the billing workflow:
- Approve Charge Items- this will mark charge items as 'Ready to Bill'
- Generate Claims- this will create claims for all Ready to Bill charge items. Claims are automatically submitted the clearinghouse every hour, unless they fail any claim validations.
Approve Charge Items
Review new charge items and determine whether they are ready to bill.
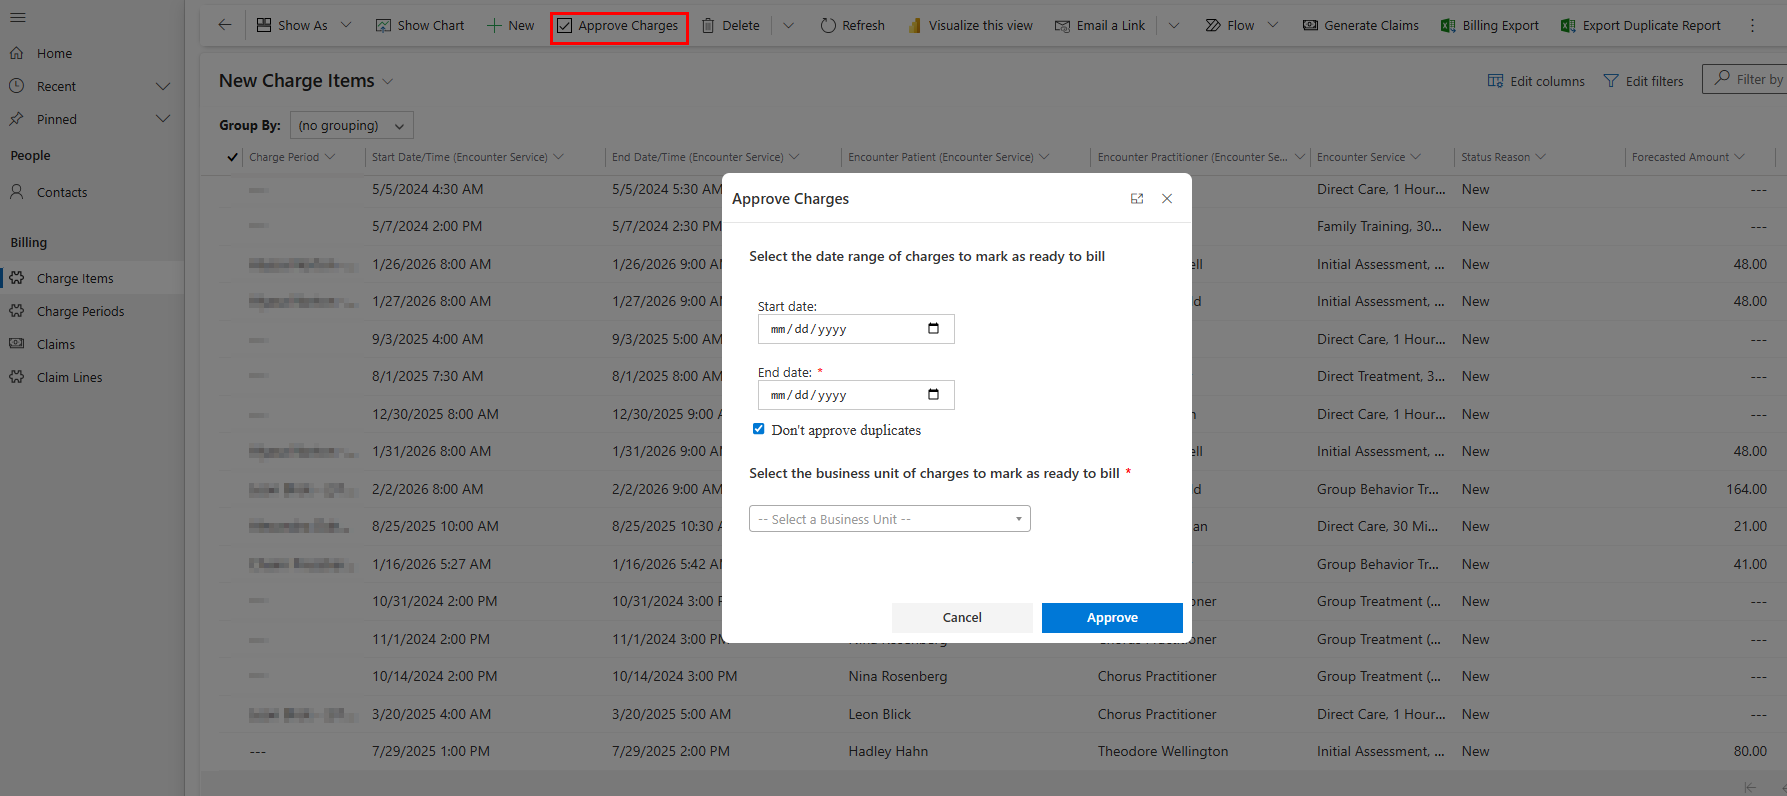
When you are ready to bill the new charges, on any charge item view, on a charge period, or on an individual charge item, click 'Approve Charges'.
- When on a charge item view, select the date range and business unit(s) of charges to mark as ready to bill.
- Keep 'Don't approve duplicates' checked off if you would only like to approve charge items that do not have duplicates (i.e., for the same patient, date of service, service code, and place of service if relevant) already billed / not submitted yet.
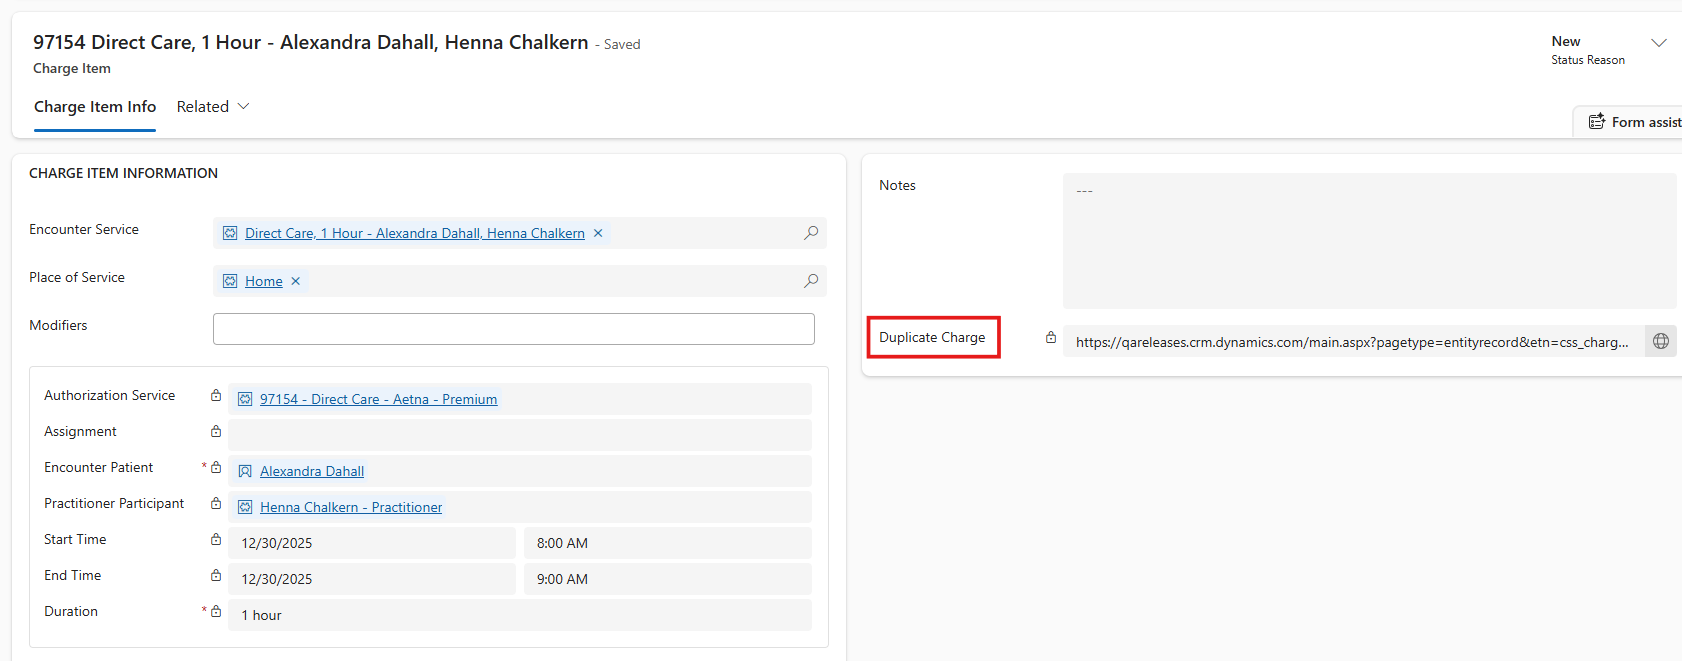
If any charge items have duplicates (i.e., for the same patient, date of service, service code, and place of service if relevant) already billed / not submitted yet, the charge item will remain 'New' (will not be set to 'Ready to Bill'), and the link to the duplicate charge item will show on the charge item.
To approve 'On Hold' charge items, first move the charge items to 'New.'
Generate Claims
When you are ready to create claims for all ready to bill charge items, click 'Generate Claims' on any charge items view to create claims and claim lines from 'Ready to Bill' charge items based on billing rules and configuration. The charge items' statuses are updated to 'Claim Line Created.'
- Charge items with the same Patient, Start Date, End Date, Procedure Code, Auth Number, Place of Service, and Rendering Provider are grouped onto one claim line.
- Claim lines with the same Patient, Auth Number, Rendering Provider, Place of Service, and Facility are grouped onto one Claim (not exceeding 50 claim lines per claim).
When generating claims, billers can control whether claims are created in Draft (editable) or Ready to Submit status.
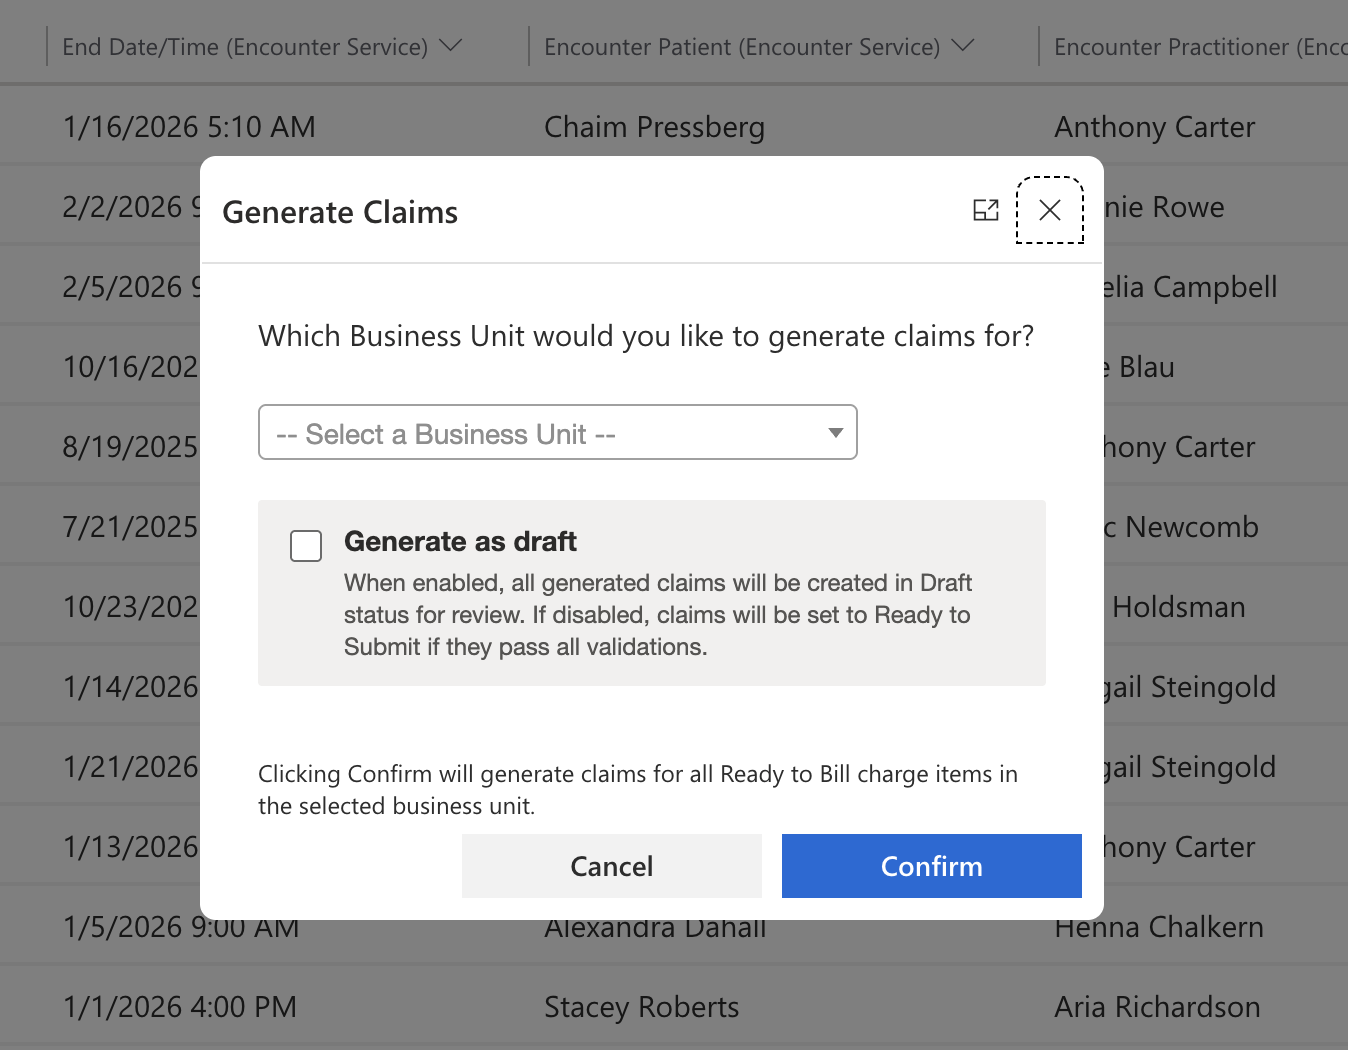
When "Generate as Draft" is checked, all generated claims will be created in Draft status for review. Leaving it unchecked will generate claims as Ready to Submit if they pass all claim validations and Draft only if they fail validation.
- When generating as draft use the "Draft Claims - Failed Validation" view for a focused view of claims that require edits, instead of all draft claims.
Manually edit Draft claims and click 'Save & Submit' on one or multiple claims to revalidate the claim and set it to 'Ready to Submit' if the edited claim passes all claim validations.
Claims that are 'Ready to Submit' are automatically submitted to the clearinghouse and updated to 'Submitted Submission' on an hourly basis. A claims transaction is automatically created.
Review Awaiting Resubmission Charge Items
When an encounter service was reopened to allow the practitioner to make edits, if a claim line was already created, the charge item will be moved from 'Claim Line Created' to 'Awaiting Resubmission.'
Review 'Awaiting Resubmission' charge items to determine if the edits made to the session necessitate modifying and resubmitting the claim.
Update charge item from 'Awaiting Resubmission' to 'Claim Line Created' and modify and resubmit the claim based on the updates made to the session.
Billing Export
If your organization uses an external billing system, when you are ready to bill for the charge items in a charge period, generate a billing export to upload to your billing system.
- On any Charge Items or Charge Periods view, click 'Billing Export'.
- Choose a start and end date of services you'd like to include in the billing export.
- An csv file will be generated with the following columns:
- Charge Item Name
- Modifiers
- Place of Service
- Location Type (on the encounter location)
- Telecare
- Business Unit
- Billable Units
- Patient First and Last Name
- Patient MRN
- Practitioner First and Last Name
- Practitioner Qualification (based on the practitioner's qualifications)
- Start Date and Time
- End Date and Time
- Duration
- Billing Unit Type (on the insurance plan benefit)
- Procedure Code (on the insurance plan benefit)
- Authorization #
- Rendering Provider (based on the practitioner who performed the session if they are qualified, or the rendering provider assignment if they are not.)
- Rendering Provider NPI
- You will be prompted whether you'd like to mark the exported charge items as 'billed externally' to track that these charge items have been exported for billing through an external system.