Views
Views of common entities can be accessed easily on the site menu. Selecting any entity on the site menu will open that entity's Main Grid. All views can be filtered and sorted according to your needs.
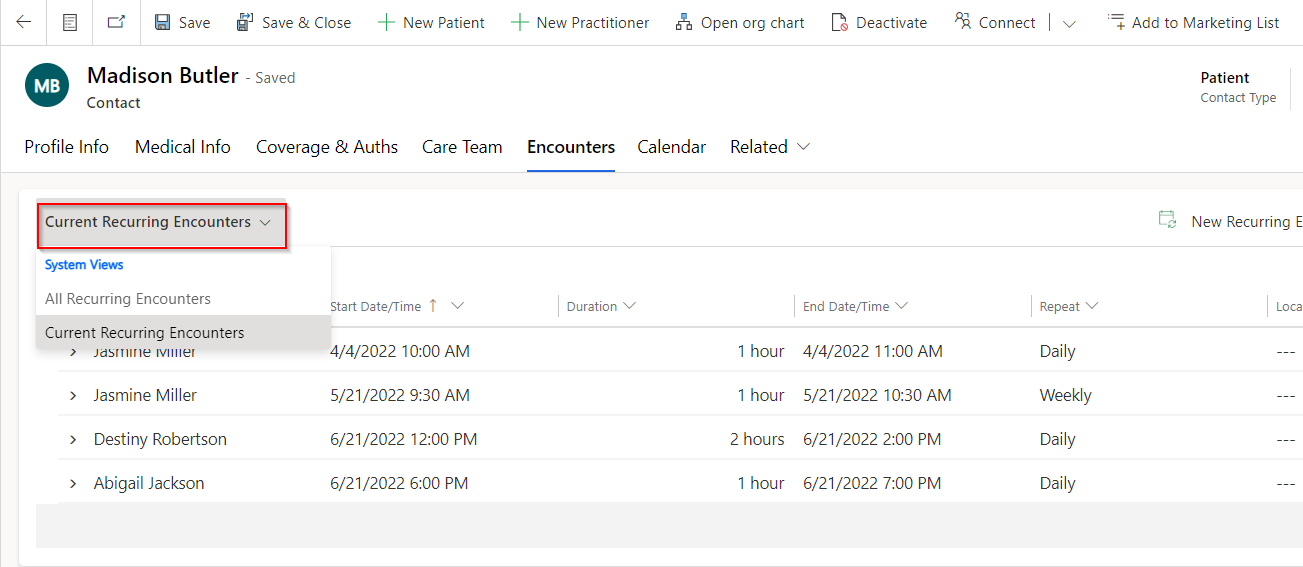
The system also includes views of relevant records on individual forms, called subgrids. Subgrids usually offer multiple views (e.g., 'Upcoming Encounters' and 'All Encounters'). You can switch between views using the View Selector.
Create a View
To create a view that suits your needs, open an existing view. You can add to and edit the existing view until it displays the information you are looking for.
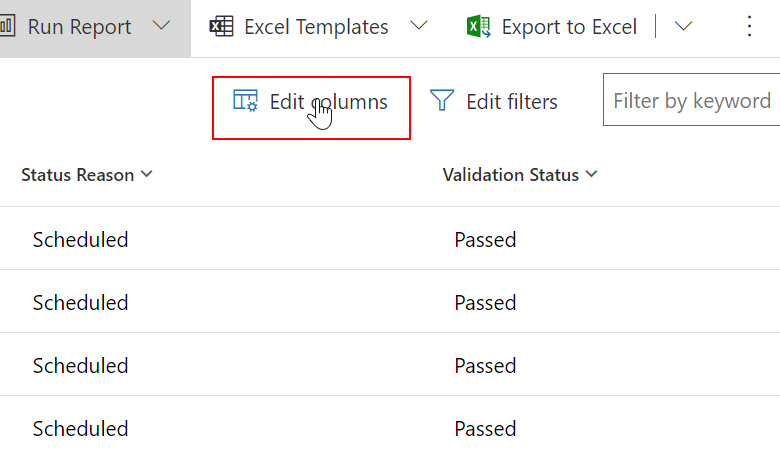
Update Columns
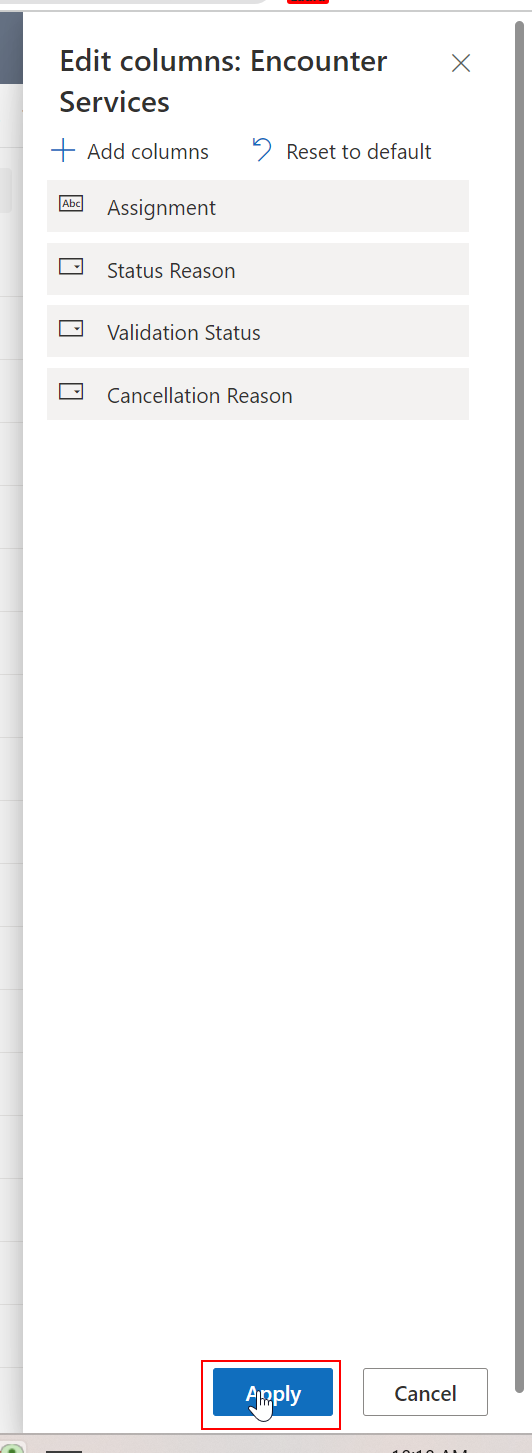
Click the 'Edit Columns' on the right-hand side of the page.
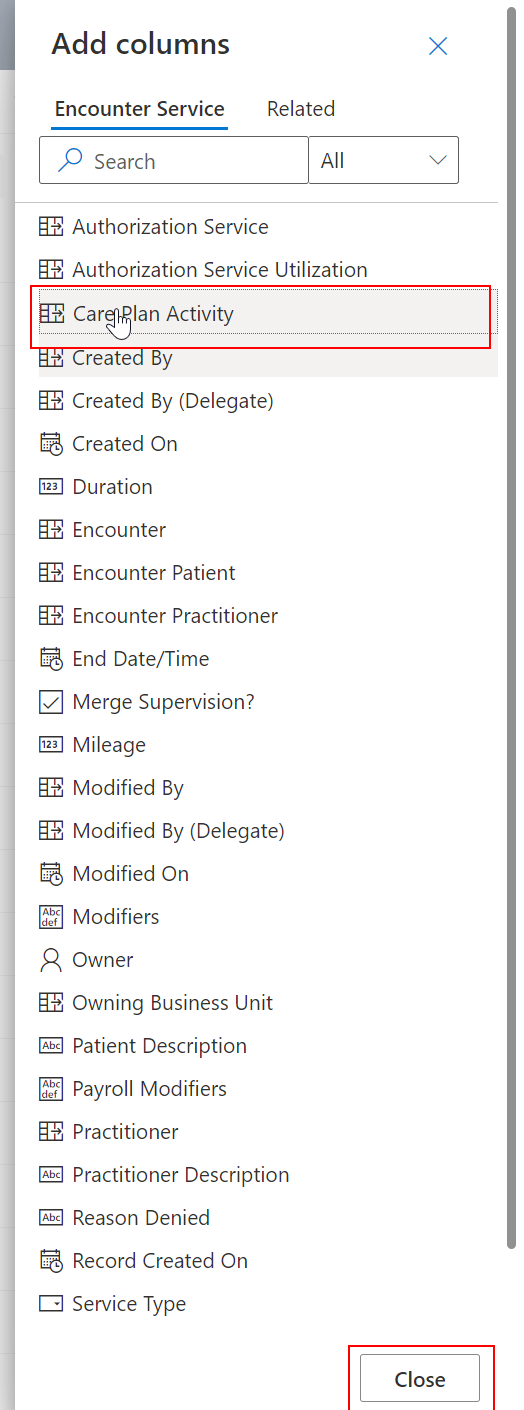
To add additional Columns to the view, click 'Add Columns' on the pop out form.
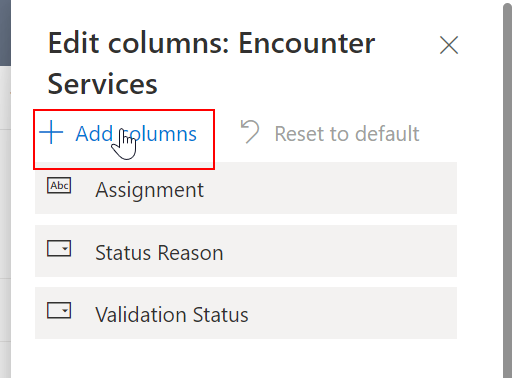
Select the columns you'd like to add.
Click apply.
Filter Rows
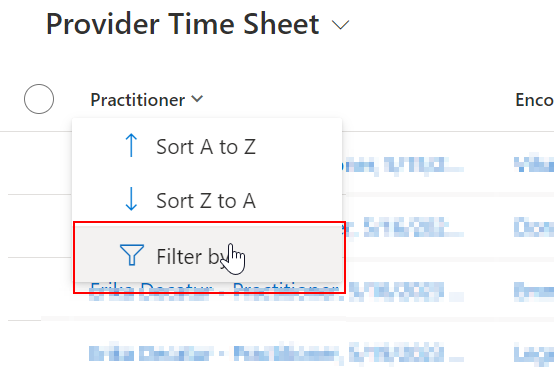
Click on the row heading you'd like to filter and click 'Filter by'.
Select operator (e.g., "Contains") and condition (e.g., "John Doe").
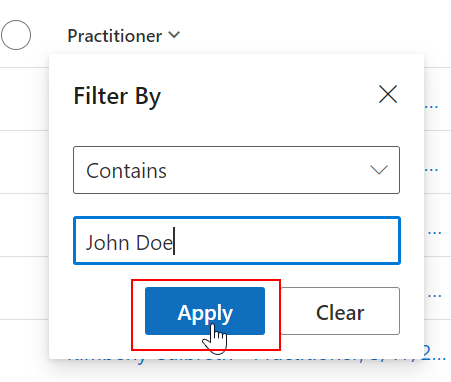
When filtering record names, 'Contains' is the best way to filter by a specific contact.
Save a View
To save a view for regular access:
Select the drop down with the current view name.
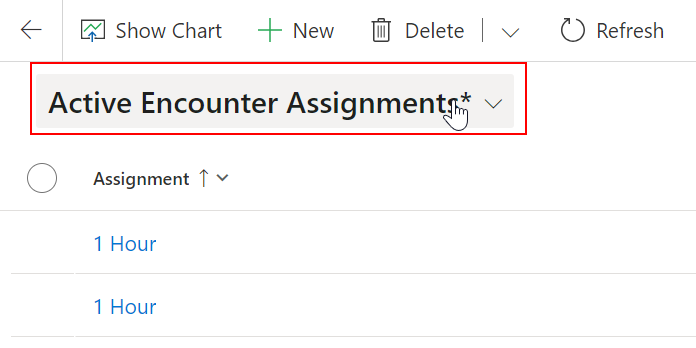
Select 'Save as new view'.
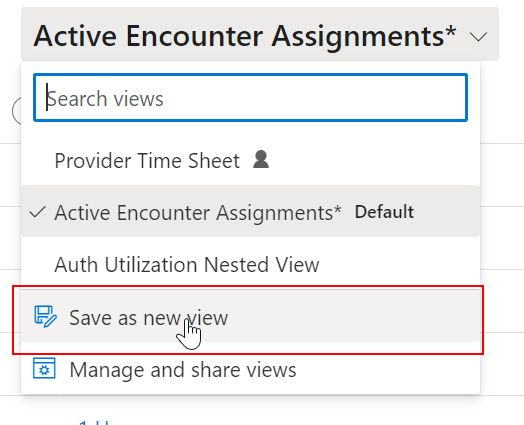
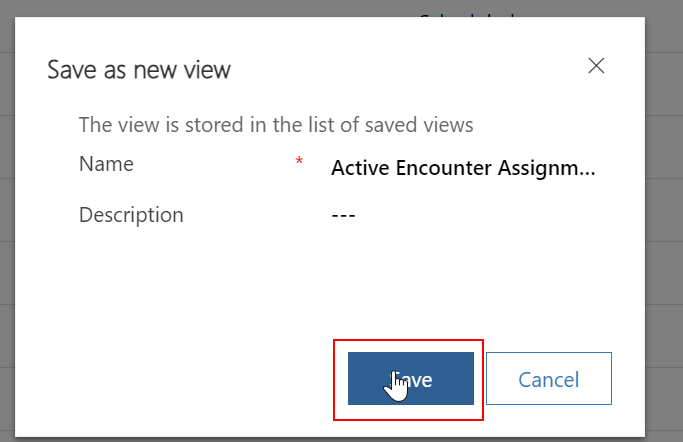
Save.
On the view selector, views created by users display a person icon, indicating they are personal views, rather than system views. You can check who created each view by hovering on the info icon on the view name.

Share a View
To share a saved view with other users:
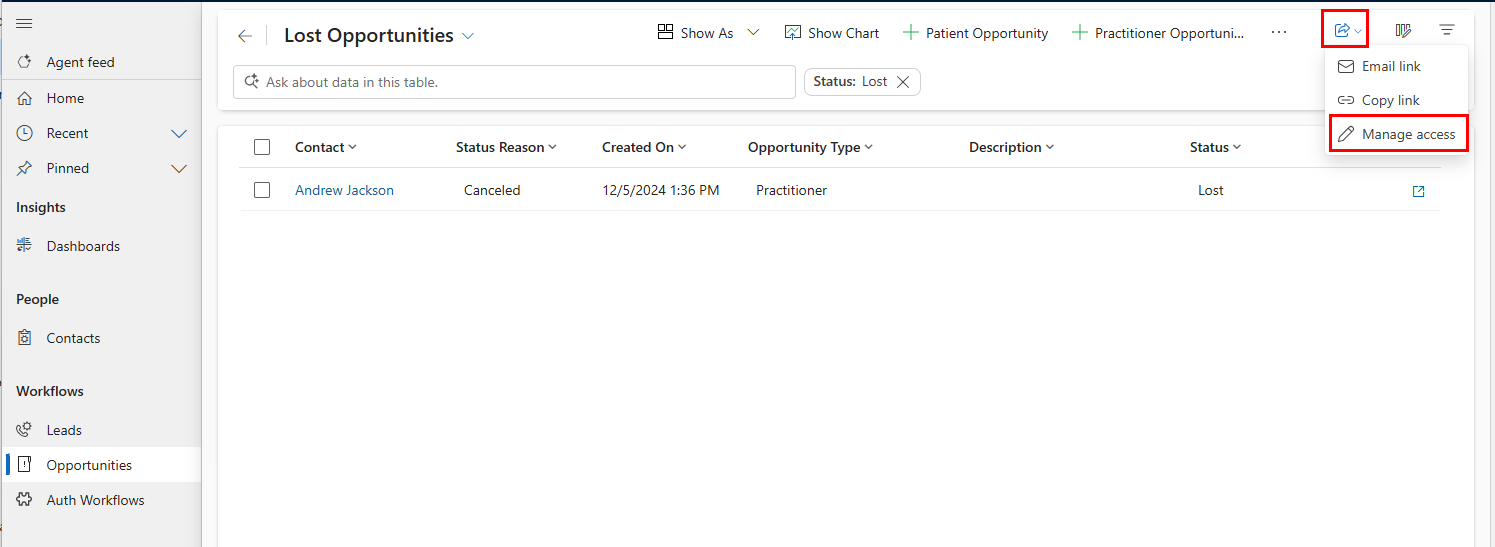
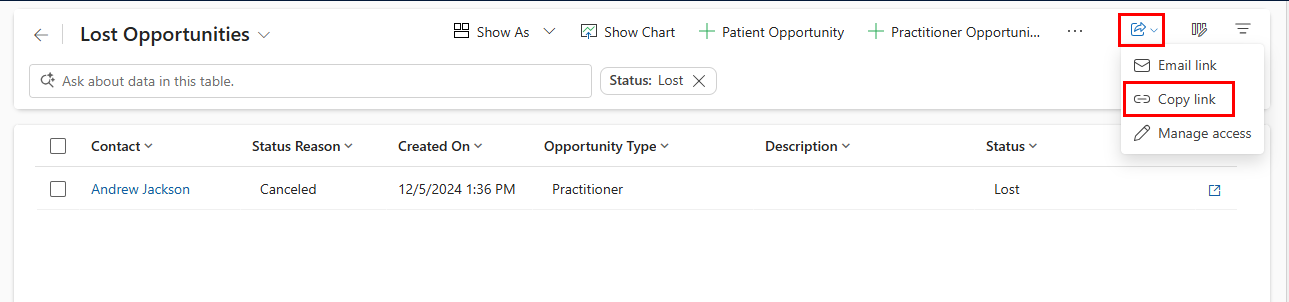
On the view you'd like to share, click the share button in the top right corner. Then click 'Manage access'.
Search for a user/team to share the view with.
Select the permissions the user should have to the view.
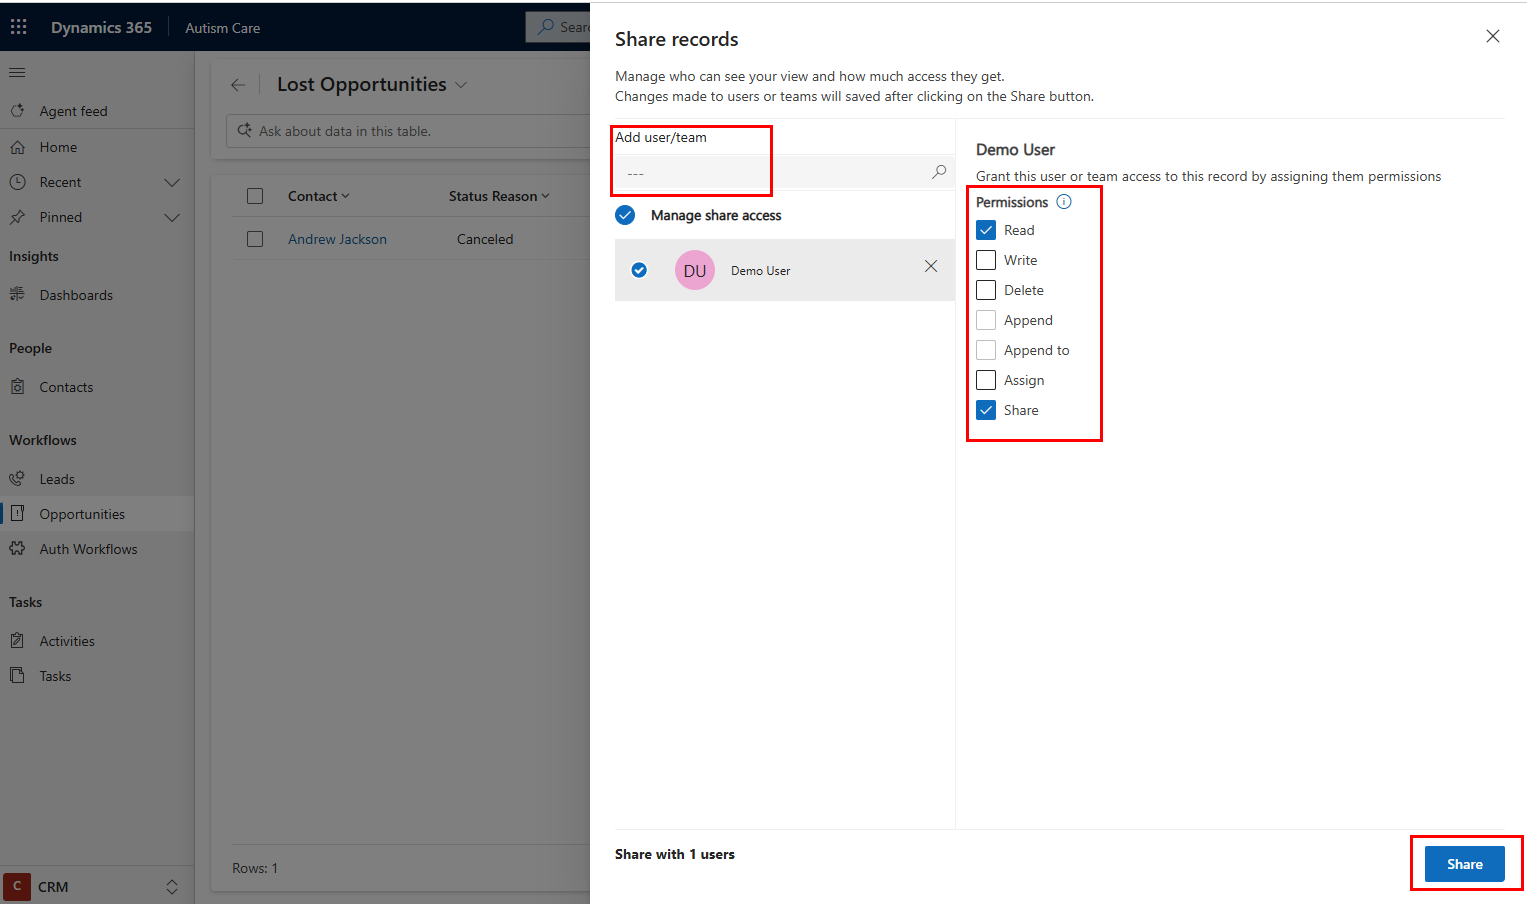
Click Share.
You can easily copy the link to the specific view you shared by clicking 'Share' in the top right corner.
Advanced Find
When there is no existing view for the entity you'd like to search, you can configure a view using Advanced Find.
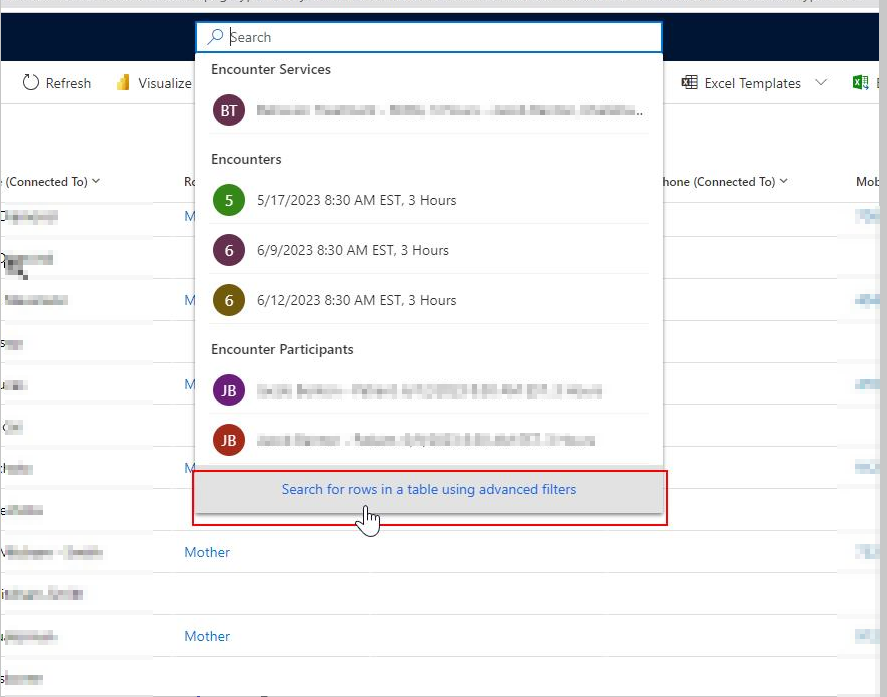
In the search bar on top pane, select 'Search for rows in table using advanced filters'.
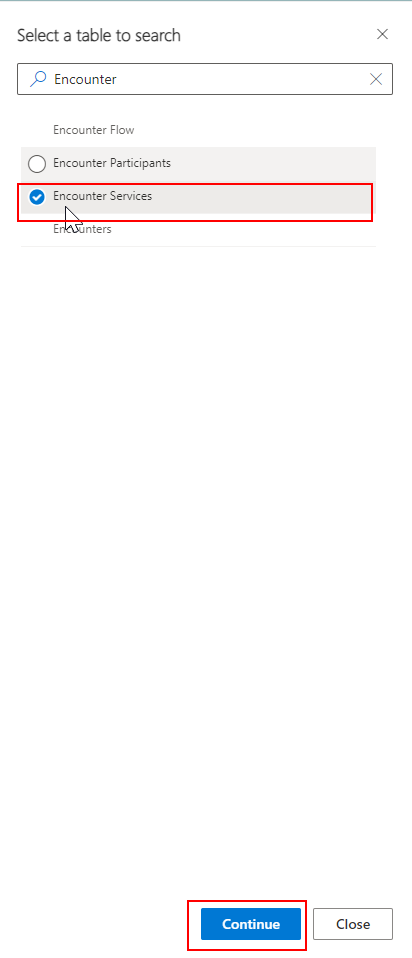
Select the entity that you would like to access.
Use the filtering options to filter the view according to your needs.
Export to Excel
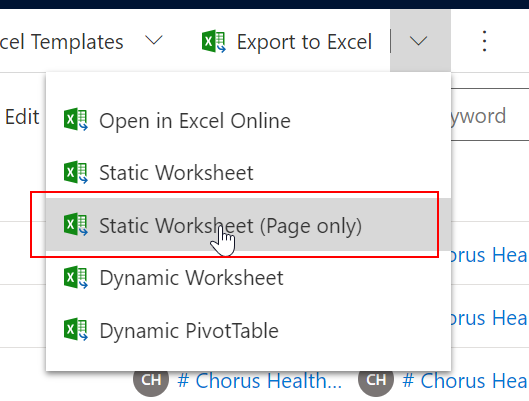
After configuring filters and columns so the view suits your needs, you can export the view as a report:
Click 'Export to Excel' to download the report.
Bulk Edit Records
Bulk edits can be made on any view.
Filter the view to records that you'd like to update:
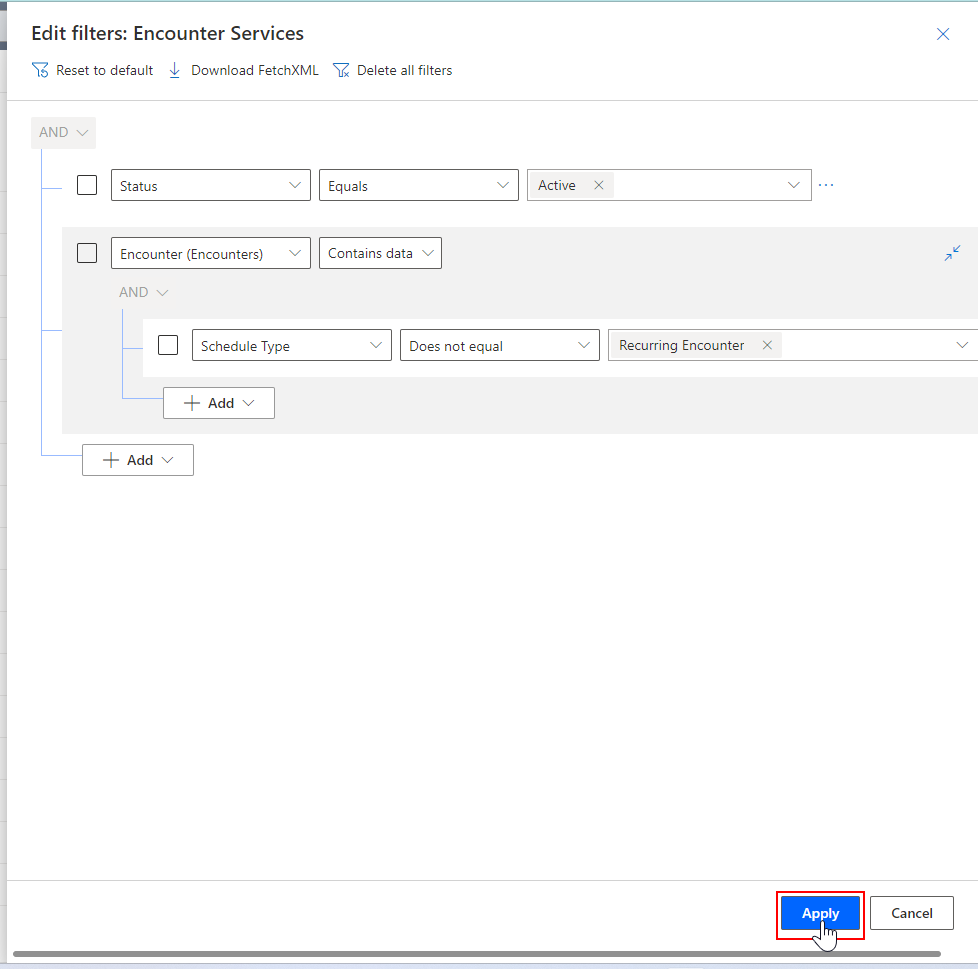
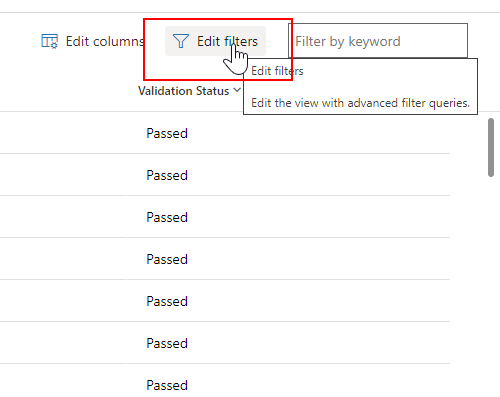
Click 'Edit Filters' on the top right corner of the view.
Update the filters as needed and click 'Apply'.
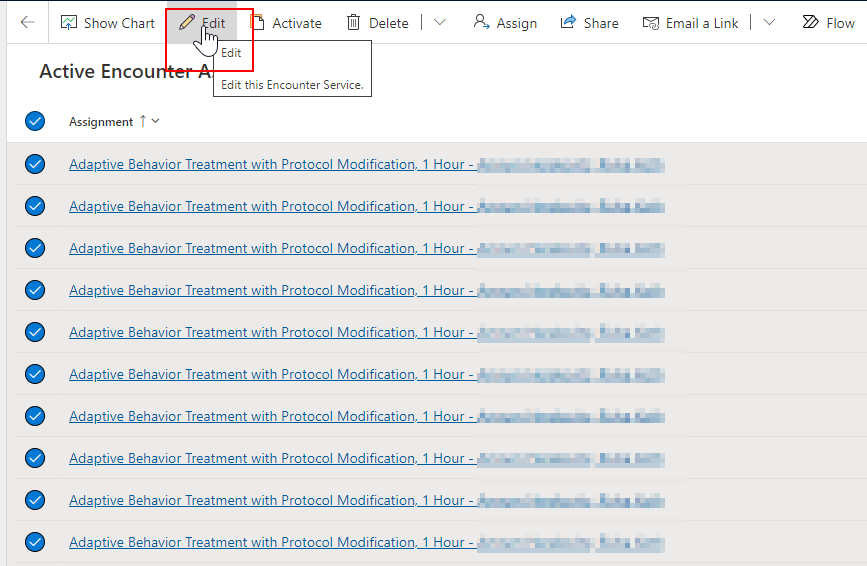
Click the edit icon on the command bar to make a bulk edit on selected records.
Update the records as necessary.

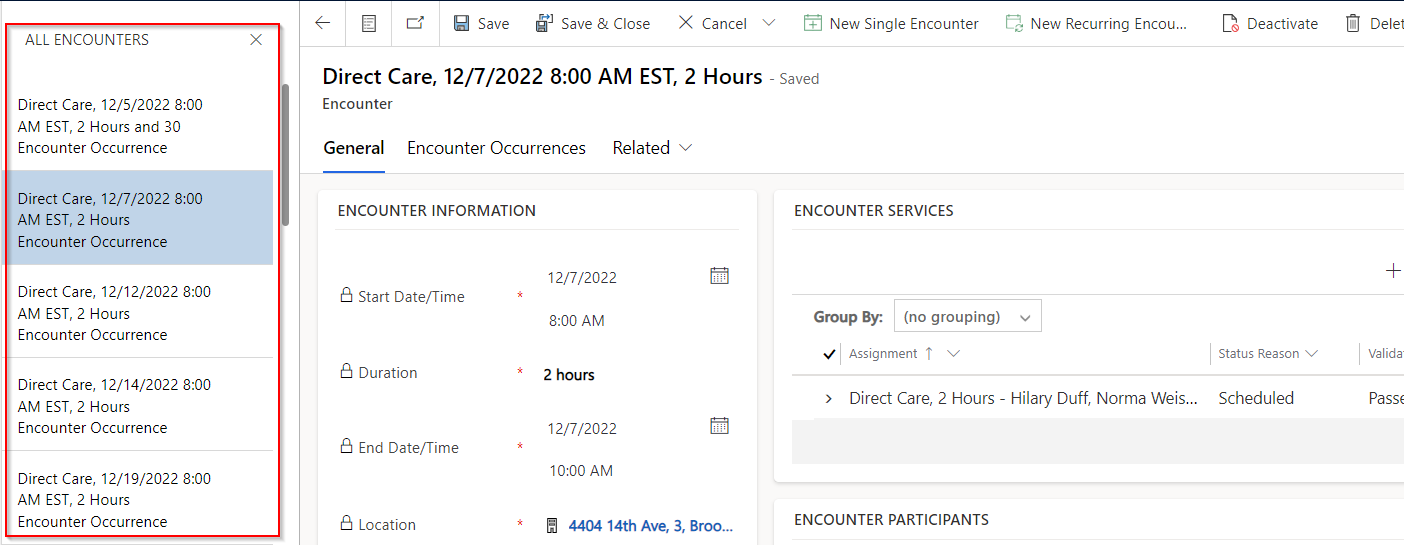
Record Set Navigation
You can easily navigate from record to record in a view with the record set navigator.
Select a record from a view to open it.
Click the list icon (record set navigation).
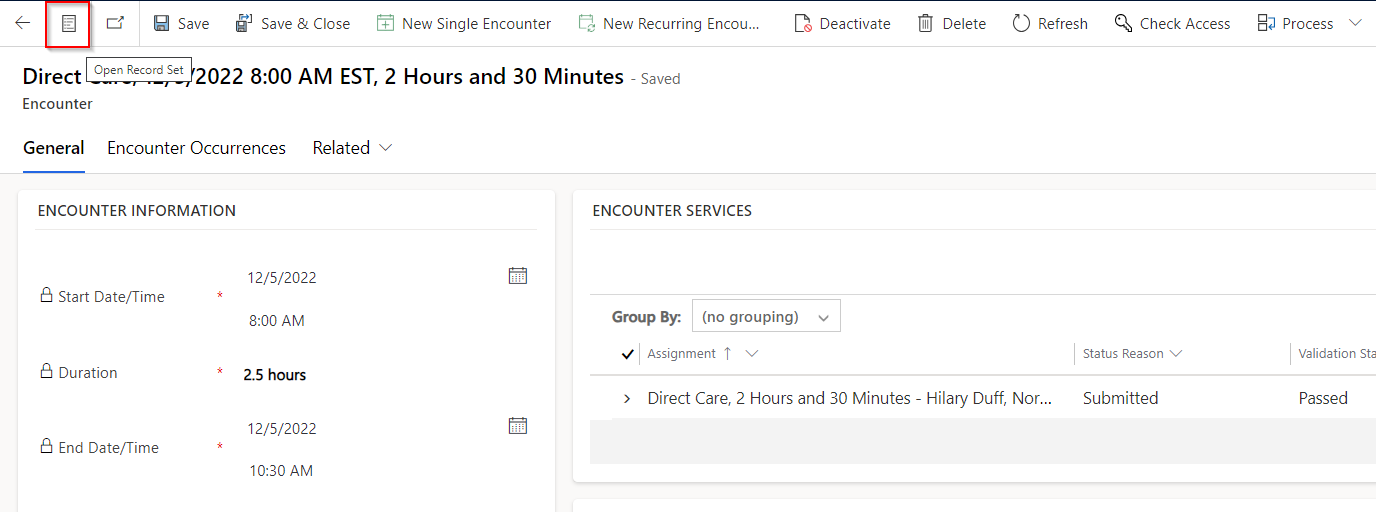
Jump between records on the list to switch back and forth between records in your view.
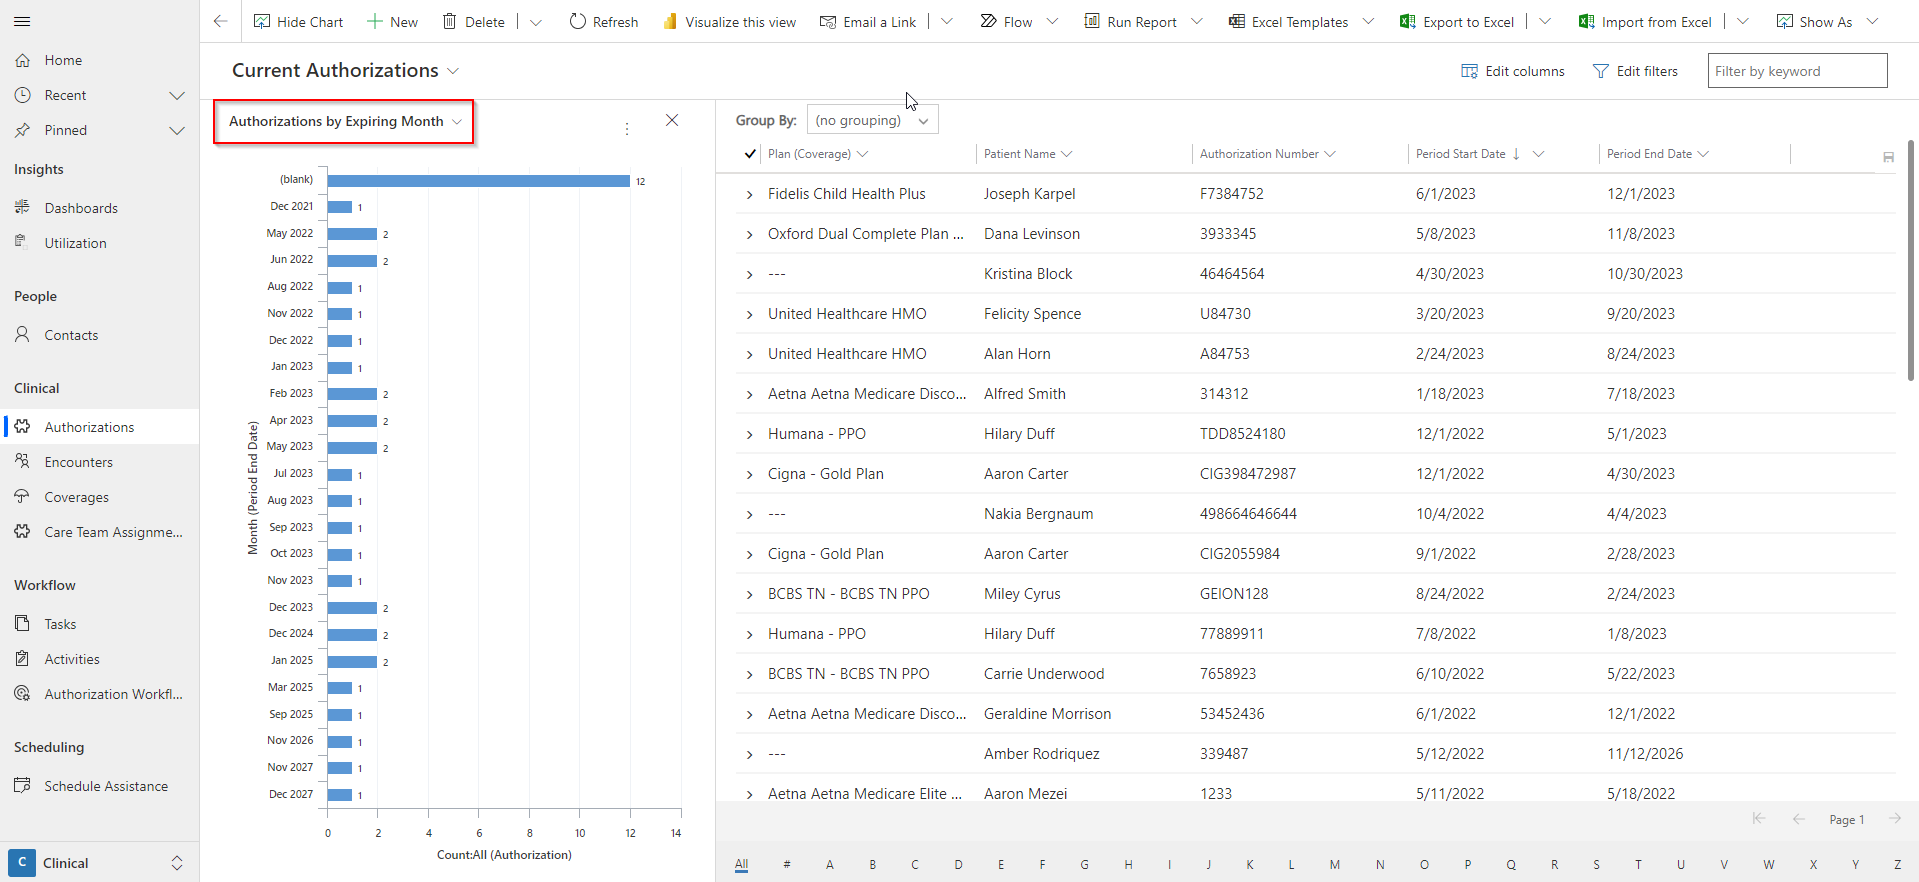
Charts
Views can also be viewed visually as Charts.
Click 'Show Chart' on the ribbon above a Main Grid.
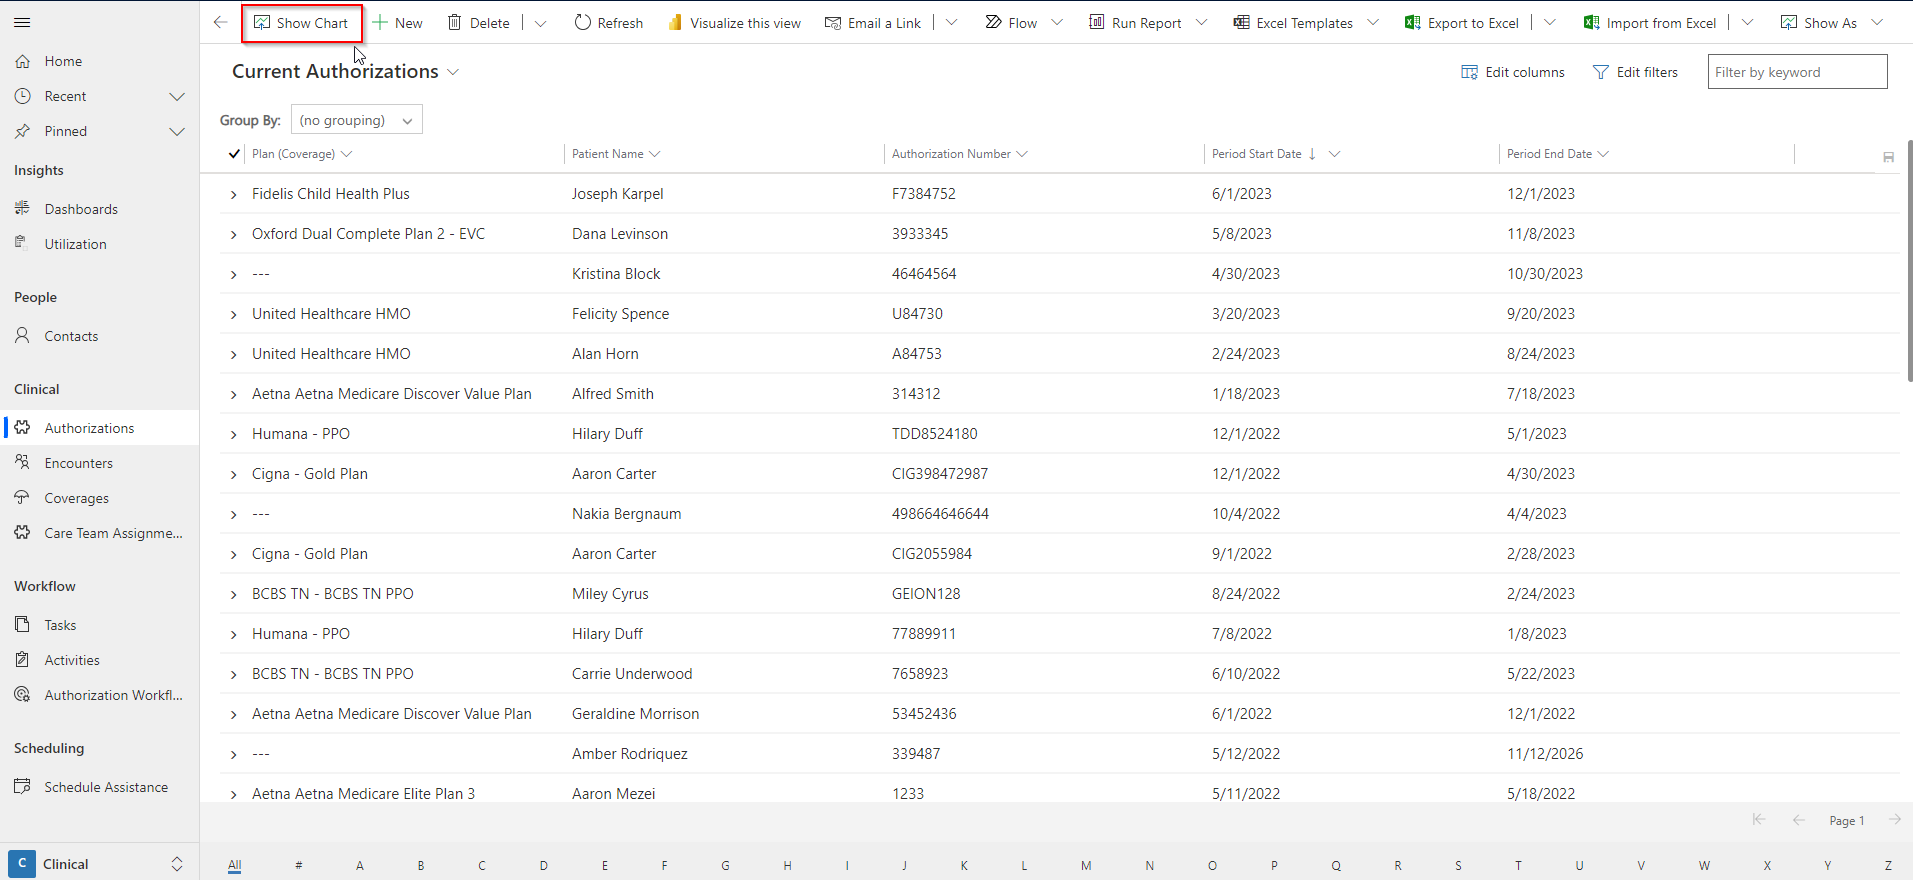
Switch between views to see other charts for this entity.