Calendar
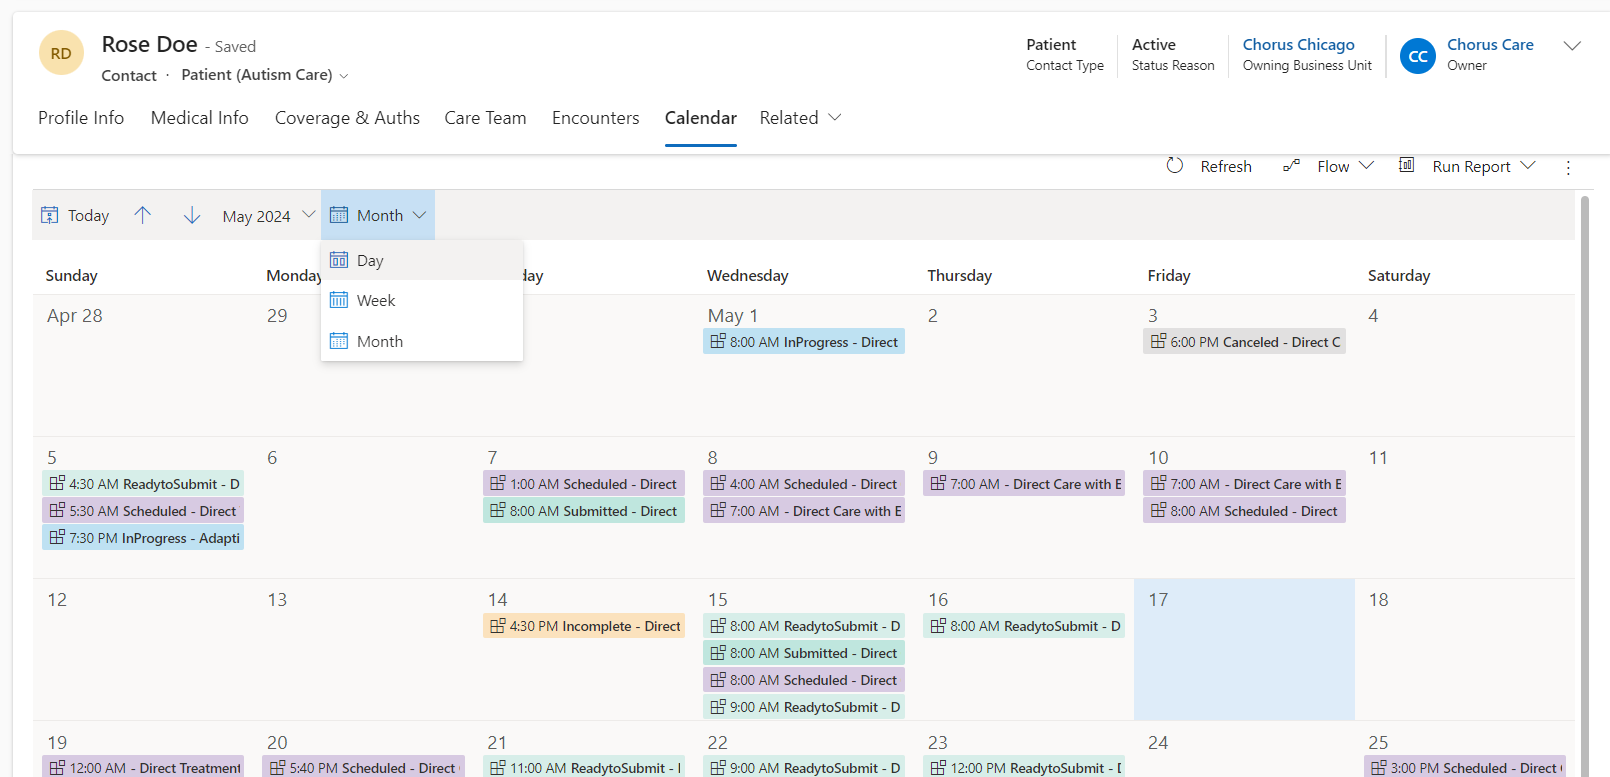
The Calendar tab displays a calendar with the patient's schedule.
The calendar displays all the Sessions scheduled for this patient. You can view the calendar by day, week or month. When looking at the calendar, the session displays the status of the session, the service that will be provided, and the practitioner's name. The session's color corresponds to the color of the session status in Note.
Upon clicking on the session in the calendar, a popout displays the exact time and duration of the session scheduled.
By clicking on 'more details' on the popout, you will be navigated to the encounter service. By clicking on 'delete' on the popout, the session will be deleted.

Set Patient Availability
The Patient Availability tab displays the Patient Availability calendar. This calendar displays the hours the Patient works/can be serviced, the hours they do not work/cannot be serviced and any time off. The Patient Availability calendar has the same 3 views as the Scheduling calendar.
To add Patient availability to the schedule, click 'Set Patient Availability'.
This will open the Patient Availability calendar in a new tab. (This tab is hidden until a User clicks 'Set Patient Availability'.)
Patient Availability is used for the Schedule Assistance tool. Any time that is set as a Patient 'does not work', displays as unavailable in the tool. This helps a Scheduler schedule a session between a Patient and a Practitioner.
Add Working Hours
Working Hours are the general hours when a Patient can be serviced (e.g., 9:00 am - 5:00 pm with a lunch break from 12:00 am - 1:00 pm). Some Patient can have different working hours every day or week, while others have the same work hours every day.
To add the hours when a Patient can be serviced to the calendar, click 'new'. This will display 3 options - Working hours, Non-working, Time off.
Upon clicking 'Working hours', a form will open on the side of the screen.
- All Day - This is a toggle which represents if the Patient is working all day or if they are working a few hours a day.
- By default, the toggle is off and you can enter a date.
- Upon switching the toggle to on, you can set a date range for all the days the Patient is working all day.
- Capacity - This is a toggle.
- By default, the toggle is off.
- Upon switching the toggle to on, the capacity field displays next to the time/date range. Then you can set a capacity limit.
- When the Capacity toggle is on, you can add a 'split' to their day. Learn more below.
- Date
- When the 'All Day' toggle is off, 1 Date field displays.
- When the 'All Day' toggle is on, 2 Date fields display for you to set a date range.
- Repeat - Here you can set when the working hours should repeat.
- Never
- Every day - Upon selecting 'Every day', you can select which days these work hours should repeat.
- Every week - Upon selecting 'Every week', you can select which day(s) each week these work hours should repeat.
- Custom
- Upon selecting 'Custom', you can select day(s) and set a time for every day that these work hours should repeat.
- When the 'Custom' option is selected, the 'All Day' and 'Capacity' toggle disappear.
- Time
- If the 'All Day' toggle is off, the 'Time' field displays.
- Upon clicking on the 3 dots next to the time, you can add a break or a split to the work hours. Learn more below.
- Time Zone
Add Break to Working Hours
Beside the field used to populate the time range, 3 dots display. Upon clicking on the 3 dots next to the time, you can add a break to the work hours. By clicking 'Add break', the system will add a break to the work hours. You can edit the time range for the break by editing the start and end time of the work hours. More than 1 break can be added.
Add Split to Working Hours
When the Capacity toggle is on, you can add a 'split' to the Patient's day. Beside the field used to populate the time range, 3 dots display. By clicking on the 3 dots next to the time, you can add a split to the work hours. Upon clicking 'Add split', the system will split the work hours into two. You can edit the time range by editing the start and end time of the work hours. More than 1 split can be added. The end time of the 1st split will be the start time of the 2nd split.
Add Non-working Hours
Non-working hours are the hours when a Patient cannot be serviced, e.g. 2:00 pm - 4:00 pm.
To add the hours when a Patient cannot be serviced to the calendar, click 'new'. This will display 3 options - Working hours, Non-working, Time off. Upon clicking 'Non-working', a form will open on the side of the screen.
- All Day - This is a toggle which represents if the Patient is not working all day or if they are not working a few hours a day.
- By default, the toggle is off and you can enter a date.
- Upon switching the toggle to on, you can set a date range for all the days the Practitioner is not working all day.
- Date
- When the 'All Day' toggle is off, 1 Date field displays.
- When the 'All Day' toggle is on, 2 Date fields display for a User to set a date range.
- Time
- If the 'All Day' toggle is off, the 'Time' field displays.
- Time Zone
Add Time off
Time-off hours are the hours when a Patient is pausing services temporarily. This can be used to schedule vacation.
To add the hours when a Patient is pausing services to the calendar, click 'new'. This will display 3 options - Working hours, Non-working, Time off. Upon clicking 'Time off', a form will open on the side of the screen.
- All Day - This is a toggle which represents if the Patient is not available all day or if they are not available a few hours a day.
- By default, the toggle is off, and you can enter a date.
- Upon switching the toggle to on, you can set a date range for all the days the Patient is not available all day.
- Date
- When the 'All Day' toggle is off, 1 Date field displays.
- When the 'All Day' toggle is on, 2 Date fields display for a User to set a date range.
- Reason
- Time
- If the 'All Day' toggle is off, the 'Time' field displays.
- Time Zone